Credit @4esttrekker on Instagram
Building your own DIY wood toolbox with drawers provides you with a practical place to stow everyday essentials and gives you a chance to sharpen your woodworking skills with a simple yet rewarding project. Suitable for both beginners and experts, creating a sturdy wooden toolbox lets you customize the design of the drawers to best fit your woodworking tools and personalize details like the color and handle style for an aesthetically pleasing addition to your workshop.
DIY wood toolboxes can also save you money when you already have leftover wood and extra hardware from previous projects. If you’re interested in making a DIY wood toolbox with drawers, read on to find out how to build a tool chest that increases the functionality of your space while giving you the personal satisfaction of seeing a project through.
Tools and Materials Needed to Make Your Own Wooden Toolbox
Before you begin building your tool cabinet, gather your materials and supplies so you have everything you need at the ready. The first thing to add to your list is wood, preferably one of the following types:
- Pine: Ideal for beginners, affordable pine has a forgiving softness that makes it easy to work with but also makes the wood more prone to denting and scratches.
- Oak: Suitable for experienced woodworkers, the hardwood oak offers a classic look, but its density sometimes makes it challenging to work with for beginner and intermediate woodworkers.
- Plywood: When you want a budget-friendly option that’s great for base and side drawer construction, plywood works well. It comes in various grades so you can choose the quality you need.
Next, you need these basic tools to build your DIY wood toolbox with drawers:
- Saw: For cutting wood to size
- Drill: For creating holes and driving screws
- Clamps: For holding pieces in place while screwing or gluing
- Measuring tape: To ensure accurate measurements
- Sandpaper: To smooth wood and prep it for finishing
Other essential materials for this project include:
- Screws: For securing wood together
- Wood glue: For added joint reinforcement
- Drawer slides: For smooth drawer movement
- Paint: To personalize the look of the toolbox
- Wood finish: To protect toolbox from the elements
Get inspired with this tool chest by Curtis (@4esttrekker on Instagram). Recreate this look with these products!
View this post on Instagram
Step-by-Step DIY Wooden Toolbox Construction Guide
Now that you’ve gathered all the materials, tools and supplies you need to build a DIY tool cabinet, follow these steps to complete your project.
 Step 1: Planning and Designing Your DIY Wood Toolbox
The first step in building a personalized toolbox is planning and designing. Consider the size you need, the number of drawers necessary to hold your hardware and any specific features or compartments you’d find useful. Sketch out your design or use premade plans available in woodworking books or online. When figuring out the overall dimensions of your tool chest, take into account every facet of the design, including the thickness of the wood you’re using.
Step 2: Cutting the Wood
When you finish your design, the next step is cutting out its individual pieces from the wood. Mark the correct dimensions using your measuring tape, and then cut the pieces according to the plan. Remember to measure twice and cut once to ensure accuracy — the more precise your cuts, the easier your toolbox will be to assemble. While cutting the wood, wear appropriate safety gear such as goggles, and use proper cutting techniques to prevent warping and for added safety.
Step 3: Assembling the Toolbox Frame
Start assembling the frame with all the pieces you’ve cut out. First, join the sides to the base by using wood glue and screws, ensuring the structure is squared and stable. Secure pieces in place with the clamps to keep everything properly positioned while the glue dries. Measure the diagonal dimensions of the squared frame — they should have the same measurements when perfectly squared.
Step 4: Building and Installing the Drawers
Constructing the drawers comes next. Measure and cut the drawer parts for the drawer sides, fronts, backs and bottoms. Assemble each one as you go by gluing or screwing the drawer sides together, then attaching the bottom panel. Once you’ve put the drawers together, install them in the tool chest with drawer slides or guides and test them to ensure they open and close smoothly.
Step 5: Adding Handles and Finishing Touches
The last step in building your own DIY wooden toolbox is adding the handles and other finishing touches. Choose handles, knobs and hardware that complement your toolbox’s style and functionality, and measure carefully before drilling the handle holes. Attach the hardware securely to make sure it works well, then uninstall the pieces and put them somewhere handy while you finish and protect your toolbox.
Finishing and Protecting Your DIY Wood Toolbox
Now that you’ve completed the construction of your toolbox, it’s time to finish it with a protective coating. A well-applied finish enhances the look of your toolbox while reducing wear and tear, keeping it looking its best over time, even with frequent use in your workshop.
 Sanding and Smoothing
Sand the entire finished toolbox to remove any rough edges, and smooth the surfaces with either sandpaper or Surfprep R.A.D. Pads Pro for improved control. Start with a rough grit sandpaper, then move to progressively finer sheets to get a super-smooth finish. Sanding like this provides the perfect surface for your piece by helping the finish better adhere to the wood.
Applying the Finish
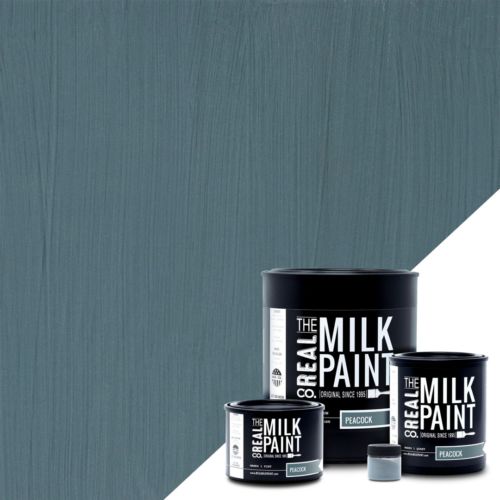
Next, find a finish that’s well-suited to your preferences and needs. For example, you might first color your tool chest with Real Milk Paint. Our wide array of colors gives you options to put a personal touch on your toolbox that makes it uniquely yours. Two coats of Real Milk Paint typically suffice when you want to achieve a durable yet beautiful finish, but adding a finishing oil like our Pure Tung Oil or our Clear Carnauba wax further protects your project. Our paints leave your wood porous, so our finishing oils penetrate deeply and cure for extended longevity. You can also pair our products with stencils, rub-on transfers and decorative hardware to completely customize your DIY wooden toolbox.
Maintenance and Care Tips
Proper maintenance helps your DIY wood toolbox with drawers stand the test of time. For instance, regularly cleaning it removes dust and debris that can damage the finish. No matter how often you wipe it with a damp cloth and gentle cleaner, however, you still need to occasionally reapply the finish to add an extra layer of polymerized protection. Lastly, store your toolbox in a dry place to prevent moisture damage, and avoid setting it directly on the ground where it might soak up water.
Wrapping Up Your Masterpiece
Crafting a DIY wood toolbox with drawers lets you show off your creativity with a highly practical project. By following these instructions, you can make a fashionable and functional tool chest that matches your precise needs and showcases your woodworking skills. Start your project today with help from the Real Milk Paint Co.’s family of nontoxic products and embrace the satisfaction of building something that lasts with your own two hands.
Need plans for your wooden toolbox? Check out this video
