Whether you’re refinishing timeworn pieces or removing the roughness from furnishings you built yourself, knowing how to sand wood furniture helps you in numerous ways. Sanding wood furniture before finishing creates a smooth surface that significantly enhances the aesthetics of your piece, giving it a polished look. An essential part of any woodworking project, sanding the wood also makes paint and finishing oils adhere better for improved longevity and long-term beauty. Our comprehensive guide explores how to properly sand wood for a smooth finish.

Understanding Sandpaper Grits
Before sanding wood, knowing how sandpaper grit works helps you make better decisions. Sandpaper grit refers to the coarseness of the abrasive surface particles, and it’s measured by grit numbers, with lower numbers indicating coarse-grit sandpaper that removes more material from your wood surface. By contrast, higher-grit sandpaper provides a smoother finish by removing residual roughness left behind by coarse sandpaper.
The main types of sandpaper include:
- Extra-coarse sandpaper (24-36): Rough grit sandpaper for coarse sanding wood floors before refinishing
- Coarse-grit sandpaper (40-60): Removes large amounts of material from wood surfaces
- Medium-grit sandpaper (80-120): Works for general sanding purposes and smoothing out rougher surfaces
- Fine-grit sandpaper (150-180): Great for final sanding before you finish your piece
- Extra-fine grit sandpaper (220-400): Smooths out finishes between coats of paint or oil
When you want to know how to sand down wood and you’re figuring out the sandpaper grits you need, consider the sandpaper material. Aluminum oxide is the most common abrasive used due to its durability and suitability for wood, while harder, sharper silicon carbide works better for wet sanding and use on metal and glass. For speed during heavy-duty tasks, pick ceramic sandpaper, or choose garnet for a super-smooth finish when hand sanding.
Preparing the Wood Surface
Preparing flat surfaces for sanding makes all the difference in your project’s success. First, clean the surface to remove any dust and debris. Then, dry it off thoroughly, as moisture can interfere with sandpaper movement and create an uneven area. Stripping paint may be necessary in some cases, but if you’re working with unfinished wood, simply inspect it for knots, resin, cracks, or metal stains. Repair imperfections with products like Real Wood Filler and Oxalic Acid Wood Bleach. Lastly, remove any nails and hardware and clean the surface again with a residue free cleaner.
Initial Sanding
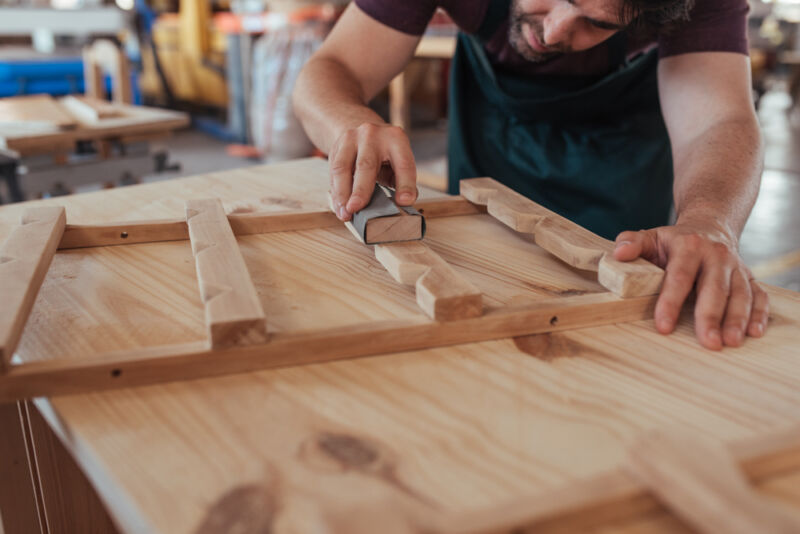
The first contact between your sandpaper and surface sets the tone for your entire project, so select carefully. Most woodworkers use very coarse sandpaper for their first pass because it removes rough spots and better shapes the wood. Once you start, remember to only sand with the grain to prevent scratching. Using sanding blocks and orbital sanders for the initial sanding helps you maintain even pressure, as too much pressure may create an uneven surface. Also, be careful when using a power sander with coarse-grit sandpaper to prevent gouges in the wood.
Progressing to Finer Grits
As you move deeper into your project, you also move between coarser and finer grit sandpaper to add a uniform smoothness to your flat surface. This progression, however, happens gradually, and skipping grits can make your surface uneven. For intermediate sanding, start with medium-grit sandpaper to smooth out coarse sanding marks. Then, refine your work with a fine-grit sandpaper. Run your hand over the surface periodically to check for smoothness and uniformity. When it feels right, move on to the final sanding phase.
Final Sanding
Use an extra-fine grit sanding block to get a flawless finish with your final sanding pass. This sandpaper provides a glass-like finish when you use light pressure and even strokes to prevent scratches. If you’re applying multiple coats, lightly sand wood between each one with an extra-fine grit sanding pad, such as Surfprep Non-woven Hand Pads, to ensure your final layer’s smoothness.
Sanding Tools and Equipment
Having the right tools for the job helps immensely, as does selecting tools based on the size and nature of your project. For instance, a finer grit sanding pad like Surfprep R.A.D. Pads Pro works better for detail work and tight corners, while machine sanding with the coarsest grit works best for smoothing flat surfaces like flooring. Also, keeping tools well-maintained ensures you have them for your next project. Clean sandpaper by tapping or brushing off the dust and storing it in a clean, dry place.
Essential sanding tools include:
- Sandpaper. Good quality sandpaper comes in various grits to accommodate each step of the sanding process.
- Sanding block. Sanding blocks help you maintain even pressure and avoid finger marks when you’re hand-sanding surfaces.
- Power sander. Orbital sanders and power sanders speed up the sanding process but require more skill and vigilance than hand sanding.
 Safety Tips While Sanding Wood
Before you start sanding furniture and surfaces, make sure your area has the proper ventilation and provisions for dust collection. Gear up with dust masks to prevent breathing in the debris, and use goggles and gloves to avoid skin and eye irritation. When you finish sanding, dispose of worn-out sandpaper and hand sanding blocks and sweep up any sanding dust.
Common Sanding Mistakes and How to Avoid Them
Common mistakes can make your project more difficult than it needs to be. Fortunately, a little forethought and effort help you avoid most of them. These include:
- Over-sanding. This mistake occurs when you take off too much material and create an uneven surface. Regularly checking your work with your hand lets you gauge the smoothness and stop when it’s at the right point.
- Skipping grits. Failing to progress gradually through the grits can create a rough finish. Avoid this by following the proper grit progression from a lower to higher grit sandpaper.
- Improper pressure. Adding too much pressure to your sanding block or sheet can gouge the surface. By contrast, too little pressure makes more work and doesn’t help you achieve the results you want. Avoid this mistake by maintaining even pressure and focusing on proper technique.
Sand Wood the Right Way With the Real Milk Paint Co.’s Professional Products
Achieve the high-quality results you want by using products from the Real Milk Paint Co. Whether you want to know what grit to sand wood with before staining or what grit to sand wood with before painting, our Surfprep line of sanding pads, rectangular hand pads, and non-woven discs comes in a variety of grits to help you fine-tune your woodworking projects before adding a splash of vibrant color with Real Milk Paint.


