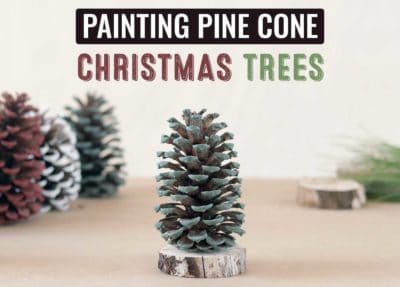
 Painting pine cones into Christmas trees is a fun, easy way to celebrate the holiday season with your family. This kid-friendly craft requires minimal prep time, and if you live in an area with coniferous trees, you may not need to spend much money on supplies. From start to finish, here are some practical tips to help you make the most of your holiday pine cone crafting experience.
Gather Your Pine Cones
Stroll through your neighborhood, hike through the woods or search a local park for free pine cones. When possible, look for those that have already fallen rather than pine cones still nestled in the branches. Fallen cones from a pine tree have had time to dry out and harden, so they may be easier to prep for Christmas crafts. Look for pine cones that are open, with a partial stem and no broken wings. These are often easier to clean than closed cones.
Don’t live near any coniferous trees? Head to your local craft store instead. You can often find bags of dried pine cones ready for use, and they generally cost less than $10.
Choose the Right Supplies
You may have seen spray-painted pine cone crafts on Pinterest or Facebook. These crafts are quick and easy, but they don’t always turn out well. Spraying spray paint is messy, and it doesn’t adhere easily to some cones. As a result, crafters end up with a light mist of color instead of a rich, vibrant hue. Most importantly though, spray paint can expose you to toxic fumes and is certainly not recommended for use around children.
That’s why we recommend using milk paint, not spray paint. The Real Milk Paint Co. offers more than 50 colors of nontoxic, eco-friendly paint, including rich greens, reds, and browns perfect for a Christmas craft. For this project, we chose our three favorite Christmas colors, Soft White, Blue Spruce, and Barn Red.
You may want to gather some sparkly embellishments for your trees, such as glitter, pearls, and gems, for your trees. Epsom salt mimics the look of freshly fallen snow, and tiny red plastic berries lend a subtle pop of color.
Don’t forget to stock up on other essentials, such as paintbrushes and small sponges for the decorating process, plus parchment paper and a water cup. (Your local dollar store can be a great source for these.) You may find it helpful to have a low-temp glue gun on hand.
Prep Your Pine Cones for Decoration
Skip this step if you’re using store-bought pine cones. If not, start by soaking your cones in a solution with one cup of vinegar for every gallon of hot water. This removes residue, including sticky sap and dirt, and eliminates hidden bugs from lurking in your Christmas creations.
Soak your cones for at least 30 minutes, moving them around occasionally in the water. This helps keep the removed residue from settling back in the wings and stems.
Your pine cones may start to close while they soak. This is normal, and you can fix this issue by baking them for 30 minutes at 200 degrees F, or if you’re not in a hurry to get started, let your cones air-dry for a few days.
When your pine cones are fully dry, it’s time to paint and decorate them with your preferred supplies.
Pine Cone Prep for Indoor Use
- Mix a solution of 1 cup white vinegar and 1-gallon hot water
- Soak for 30 minutes, stirring occasionally
- Bake for 30 minutes at 200 degrees F
How to Paint Pine Cones
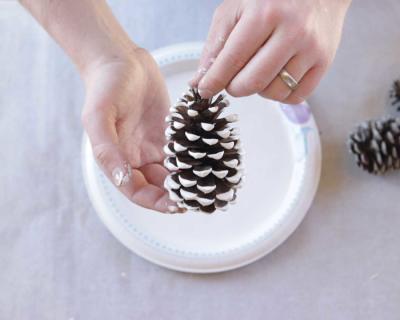 Paint-dipped pine cones look beautiful, but this technique can get tricky. If you go this route, a twisted piece of floral wire can be a handy dipping tool. Cut your wire to the desired length (about 12 inches should work), then wrap a circle of the wire around the pine cone and twist to secure. The remaining length will be your dipping handle. This was our least favorite method, due to the dripping mess and long drying times.
Instead of dunking a cone directly into a container of paint, you may prefer to simply paint the edges with an artist’s small brush or sponge. Our favorite ‘quick and easy’ way though was using the rolling method.
Simply pour a little of your favorite Real Milk Paint color onto a disposable pie tin or higher quality paper plate (the kind that are on the thicker side), then roll the pine cone through the paint. This is a really fun option for younger kids who want to make their own Christmas trees.
Tip: To keep hands clean, use plastic utensils or even a straw to move your pine cone.
Give your pine cones plenty of time to dry, preferably an hour or two, before you decorate them with ribbons or add hooks for hanging. Additionally, you may want to wait a bit if you’re gluing gemstones or Epsom salt on your mini trees. (You can generally add glitter right away, though.)
Decorating With Painted Pine Cones
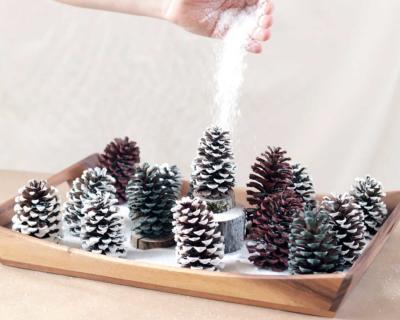
When your trees are dry, you may want to add wine corks for “trunks.” Just cut them to the length you’d like and attach with your glue gun. If you like more of a rustic, farmhouse look, skip the cork and instead use small wood slices as a base (available online and at many craft stores). A final suggestion is to extend the crafty fun by decorating jar lids that can be used as an alternative base for your trees.
Tip: If using the underside of the lid, you may even want to cover your tree with the jar, adding a little faux snow to create your very own winter wonderland topiary.
The possibilities are endless!
7 Great Uses for Your Holiday Pine Cone Trees
- Christmas Ornament
- Mantle display
- Placeholder
- Christmas party favors
- Teacher gifts
- Gift card holders
- Gift wrap embellishments
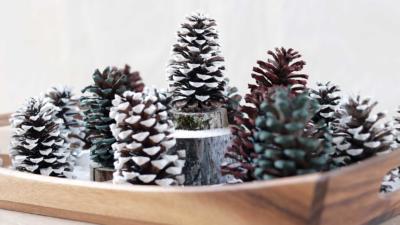 Pine cone crafts look beautiful as ornaments on the branches of a Christmas tree, but they make a wonderful holiday accent on any shelf or mantel. Try using them as placeholders for formal holiday meals, like Christmas brunch or a Christmas Eve spread.
These adorable little trees are an ideal “go-to” if you need a thrifty but thoughtful teacher gift or small, inexpensive present for neighbors and friends.
For those, you want to give a little more to include a $5 gift card for Starbucks or iTunes, or pair your mini tree with a gourmet chocolate bar or some homemade Christmas cookies.
When the holiday season ends, store your decorated cones in sealed baggies to keep out moisture. (You can also be a friend to nature and throw them outside or compost them if they’re decorated with eco-friendly embellishments.) Questions about Real Milk Paint products? Fill out our contact form or call 800-339-9748 for more info!
