Your garden furniture takes a beating from the elements — the sun, wind, and rain, plus fluctuating temperatures, can wear down even the sturdiest table and chairs in your outdoor space. The damaging effects of these common weather conditions include cracking and fading, while moisture can leave your favorite pieces covered in mold and mildew. Fortunately, proper protective measures can keep that beautiful garden bench or patio set looking great while lasting over the long haul. This step-by-step guide on how to weatherproof garden furniture helps you preserve its beauty and durability for years to come.
How to Weatherproof Garden Furniture
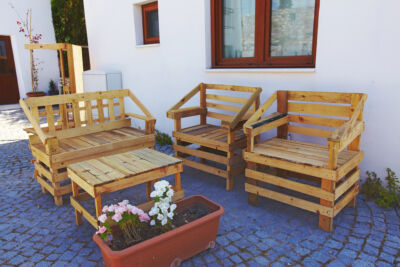
When you want to weatherproof outdoor garden furniture, this step-by-step guide walks you through the process. Keeping your garden furniture looking its best helps you enjoy your outdoor space and makes your porch, deck, or patio more comfortable when friends and family visit for warm weather holidays and during the grilling season.
Step 1: Assess Your Garden Furniture
Before you choose and apply any protective finish, inspect your outdoor furniture thoroughly to ensure its integrity before sealing the surface against the elements. Look for signs of wear and tear, including cracks in the wood, peeling paint and discoloration. If you notice any structural damage, repair those issues first. For instance, replace rotting wood with freshly cut pieces, fix divots with Real Wood Filler and remove metal stains with Oxalic Wood Bleach. Next, tighten loose screws, bolts and joints to keep patio, porch and deck furnishings safe for use by friends and family.
Step 2: Clean the Furniture
Deep cleaning removes dirt, mold and mildew and lets your protective finish adhere well to the surface. Use a reliable cleaning solution like Tri-Sodium Phosphate or Emerge Cleaner and Degreaser and a clean, damp rag to clean the outdoor furniture. Scrub the area gently with a soft brush or sponge to remove stubborn dirt and grime, rinse the surface with water to remove any residue and let the piece dry completely. After cleaning, you can also use this step to remove any old paint or clear coat finishes (water & oil-based polyurethanes for example) with Soy-Gel Professional Paint Remover or Milk Paint Stripper.
Step 3: Sand and Prep the Surface
Sanding removes rough spots and lets protective finishes penetrate surfaces deeply to prevent moisture seepage. This part of the process matters because it smooths out splinters, ensures even absorption, and removes old finishes and peeling paint. For light refinishing, use 120- to 150-grit sandpaper. However, use 80- to 100-grit to remove old finishes and then smooth out the area with 150-grit sandpaper, all of which you can get in our Surfprep R.A.D Pads Pro Variety Pack. Next, wipe down the surface with a clean, damp cloth to remove dust before moving on to the next step.
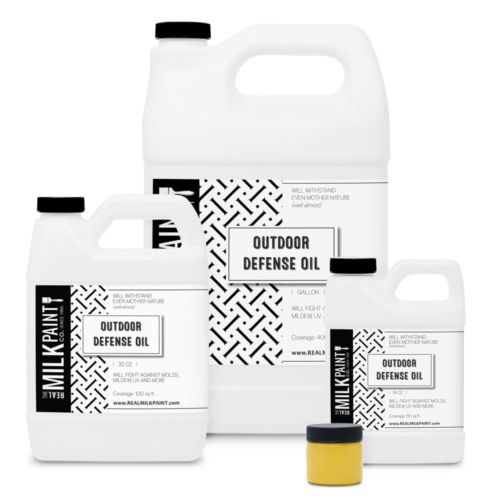
Step 4: Apply Outdoor Defense Oil, The Best Natural Protection
When you want non-toxic protection that stands the test of time, apply Outdoor Defense Oil to your outdoor furniture. This protective finish penetrates wood deeply, creating a barrier that repels water, prevents mold and mildew growth, and resists UV damage.
How to Apply Outdoor Defense Oil
Apply Outdoor Defense Oil using a clean paintbrush or lint-free cloth to add a thin, even coat. Next, let the oil soak into the surface for roughly 40 minutes, then check to see if it is all absorbed. If it is, repeat the first step until excess oil pools on the surface and then wipe it away. Outdoor Defense Oil contains no additives to speed up drying times since it cures via a natural polymerization process. Place your furniture in a warm, well-ventilated area to cure for 7 to 15 days, after which light use is possible. Complete curing, however, can take up to 30 days, so be mindful during that first critical month.
Why Choose Outdoor Defense Oil?
Outdoor Defense Oil offers numerous benefits to your outdoor furniture and the environment while adding beauty to your space with its rich, natural finish. Eco-friendly and non-toxic, this finishing oil nourishes the wood and strengthens its fibers rather than just coating the surface. Its natural UV protection prevents damage like cracking and fading from placement in direct sunlight, and it also helps your favorite chairs and table sets withstand rain and moisture with its water-resistant formulation.
Storing and Maintaining Outdoor Furniture
Even when you apply a protective finish like Outdoor Defense Oil and maintain your outdoor furniture well, proper storage and care extend its life and reduce the need for maintenance during times when it’s not in use. To ensure your weatherproofing lasts, consider covering your garden furniture during extreme weather or storing pieces under a patio cover during the winter months. Wiping down the surfaces regularly also improves the appearance and lifespan by removing dust, pollen and moisture from the wood that can cause future damage. These small steps reduce unnecessary wear and tear and ensure your outdoor furniture stays in excellent condition year after year.
Keep Your Garden Furniture Looking Great for Years to Come!
When you weatherproof garden furniture, you don’t just preserve its beauty — you also protect your investment. Following these simple steps and using our Outdoor Defense Oil for weatherproofing garden furniture can shield it from the sun, rain, and temperature changes that can damage it while maintaining its natural charm. Shop for Outdoor Defense Oil and other products from the Real Milk Paint Co. today to get started on protecting your outdoor furniture for the seasons ahead.